With iOS 26, Apple introduces the Foundation Models framework, a privacy-first, on-device AI toolkit that brings the same language models behind Apple Intelligence right into your apps. This framework is available across Apple platforms, including iOS, macOS, iPadOS, and visionOS, and it provides developers with a streamlined Swift API for integrating advanced AI features directly into your apps.
Unlike cloud-based LLMs such as ChatGPT or Claude, which run on powerful servers and require internet access, Apple’s LLM is designed to run entirely on-device. This architectural difference gives it a unique advantage: all data stays on the user’s device, ensuring privacy, lower latency, and offline access.
This framework opens the door to a whole range of intelligent features you can build right out of the box. You can generate and summarize content, classify information, or even build in semantic search and personalized learning experiences. Whether you want to create a smart in-app guide, generate unique content for each user, or add a conversational assistant, you can now do it with just a few lines of Swift code.
In this tutorial, we’ll explore the Foundation Models framework. You’ll learn what it is, how it works, and how to use it to generate content using Apple’s on-device language models.
To follow along, make sure you have Xcode 26 installed, and that your Mac is running macOS Tahoe, which is required to access the Foundation Models framework.
Ready to get started? Let’s dive in.
The Demo App: Ask Me Anything
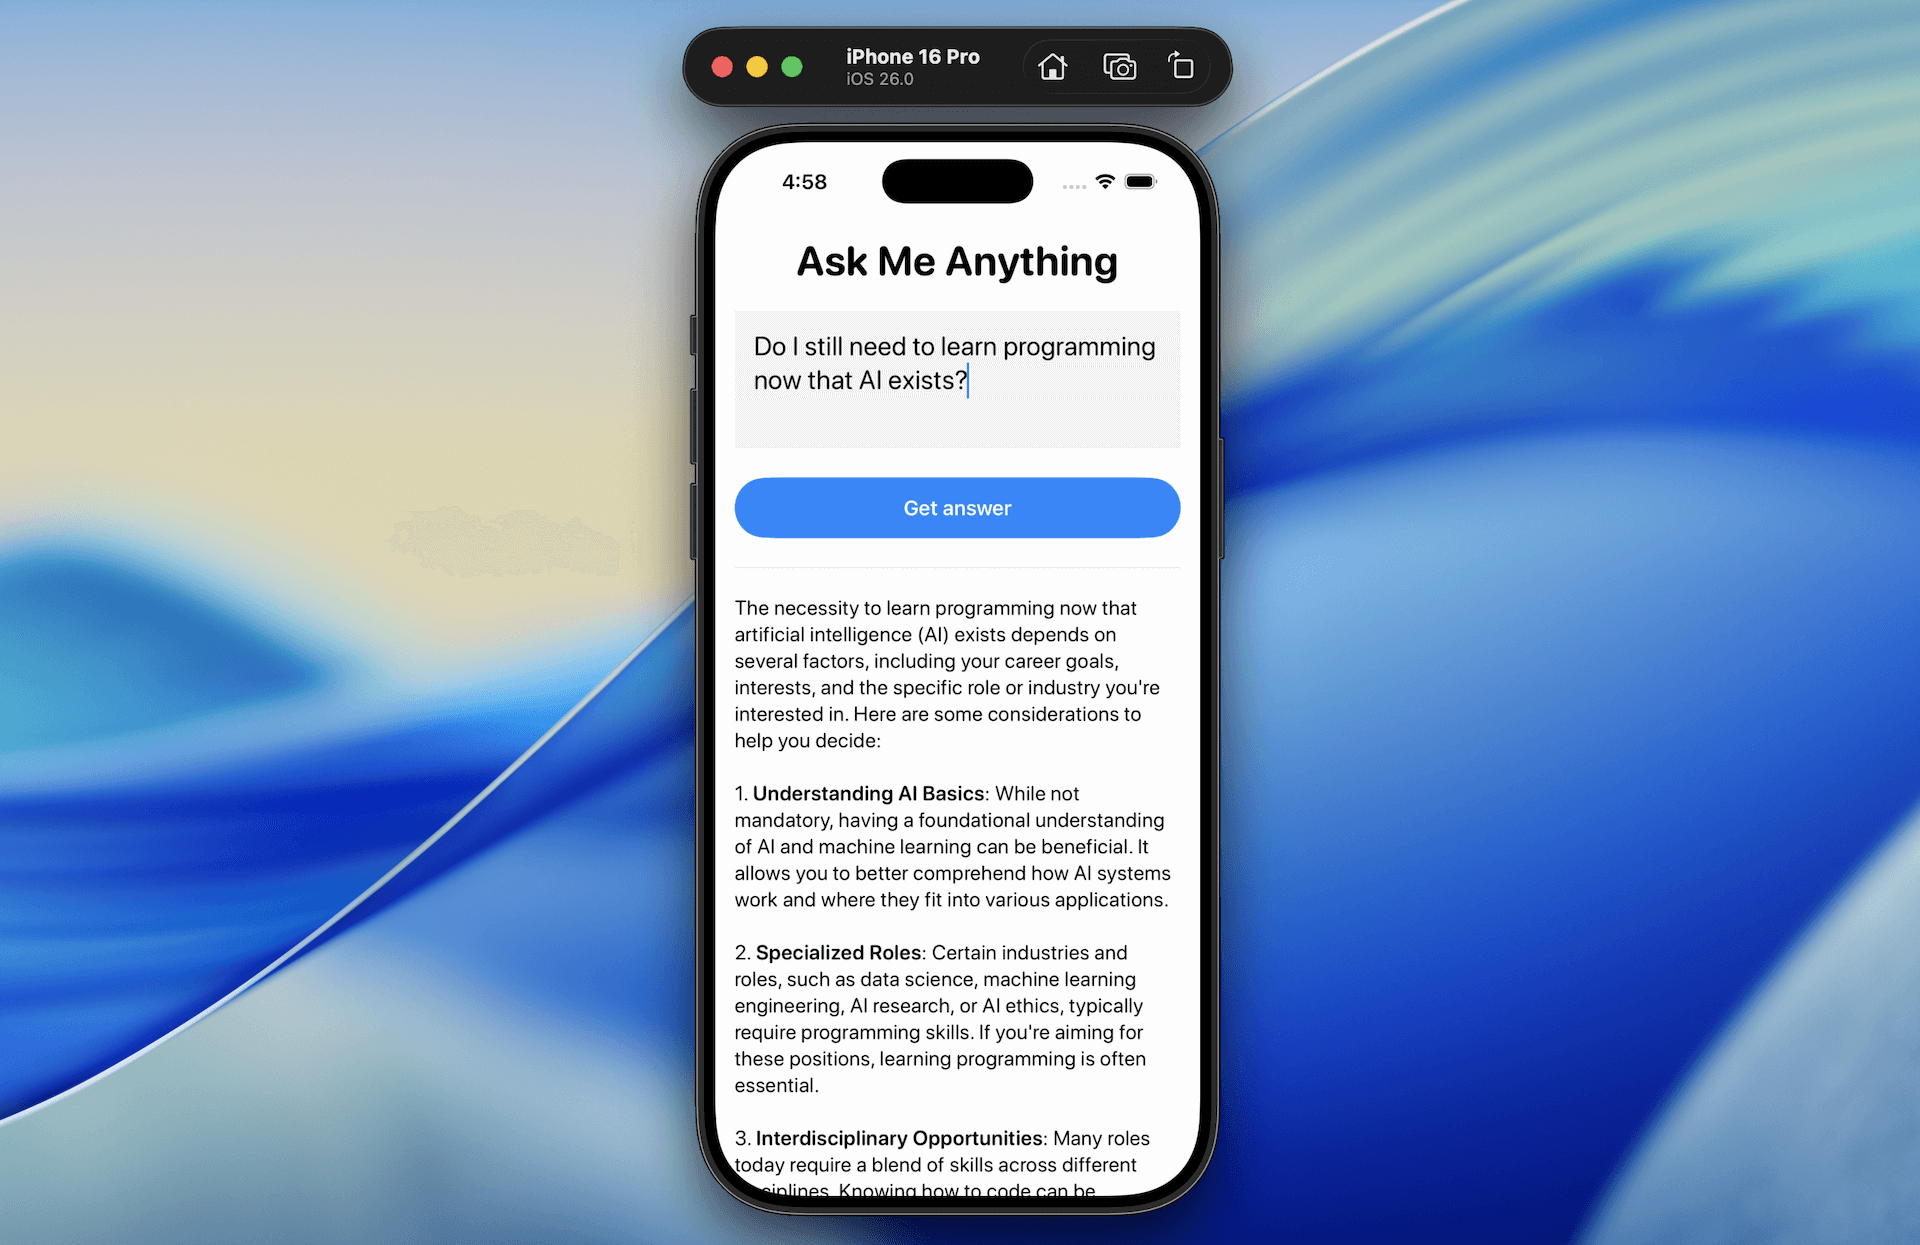
It’s always great to learn new frameworks or APIs by building a demo app — and that’s exactly what we’ll do in this tutorial. We’ll create a simple yet powerful app called Ask Me Anything to explore how Apple’s new Foundation Models framework works in iOS 26.
The app lets users type in any questions and provides an AI-generated response, all processed on-device using Apple’s built-in LLM.
By building this demo app, you’ll learn how to integrate the Foundation Models framework into a SwiftUI app. You’ll also understand how to create prompts and capture both full and partial generated responses.
Using the Default System Language Model
Apple provides a built-in model called SystemLanguageModel, which gives you access to the on-device foundation model that powers Apple Intelligence. For general-purpose use, you can access the base version of this model via the default property. It’s optimized for text generation tasks and serves as a great starting point for building features like content generation or question answering in your app.
To use it in your app, you’ll first need to import the FoundationModels framework:
import FoundationModels
With the framework now imported, you can get a handle on the default system language model. Here’s the sample code to do that:
struct ContentView: View {

    private var model = SystemLanguageModel.default

    var body: some View {
        switch model.availability {
        case .available:
            mainView
        case .unavailable(let reason):
            Text(unavailableMessage(reason))
        }
    }

    private var mainView: some View {
        ScrollView {
            .
            .
            .
        }
    }

    private func unavailableMessage(_ reason: SystemLanguageModel.Availability.UnavailableReason) -> String {
        switch reason {
        case .deviceNotEligible:
            return "The device is not eligible for using Apple Intelligence."
        case .appleIntelligenceNotEnabled:
            return "Apple Intelligence is not enabled on this device."
        case .modelNotReady:
            return "The model isn't ready because it's downloading or because of other system reasons."
        @unknown default:
            return "The model is unavailable for an unknown reason."
        }
    }
}
Since Foundation Models only work on devices with Apple Intelligence enabled, it’s important to verify that a model is available before using it. You can check its readiness by inspecting the availability property.
Implementing the UI
Let’s continue to build the UI of the mainView. We first add two state variables to store the user question and the generated answer:
@State private var answer: String = ""
@State private var question: String = ""
For the UI implementation, update the mainView like this:
private var mainView: some View {
    ScrollView {
        ScrollView {
            VStack {
                Text("Ask Me Anything")
                    .font(.system(.largeTitle, design: .rounded, weight: .bold))

                TextField("", text: $question, prompt: Text("Type your question here"), axis: .vertical)
                    .lineLimit(3...5)
                    .padding()
                    .background {
                        Color(.systemGray6)
                    }
                    .font(.system(.title2, design: .rounded))

                Button {

                } label: {
                    Text("Get answer")
                        .frame(maxWidth: .infinity)
                        .font(.headline)
                }
                .buttonStyle(.borderedProminent)
                .controlSize(.extraLarge)
                .padding(.top)

                Rectangle()
                    .frame(height: 1)
                    .foregroundColor(Color(.systemGray5))
                    .padding(.vertical)

                Text(LocalizedStringKey(answer))
                    .font(.system(.body, design: .rounded))
            }
            .padding()
        }

    }
}
The implementation is pretty straightforward – I just added a touch of basic styling to the text field and button.
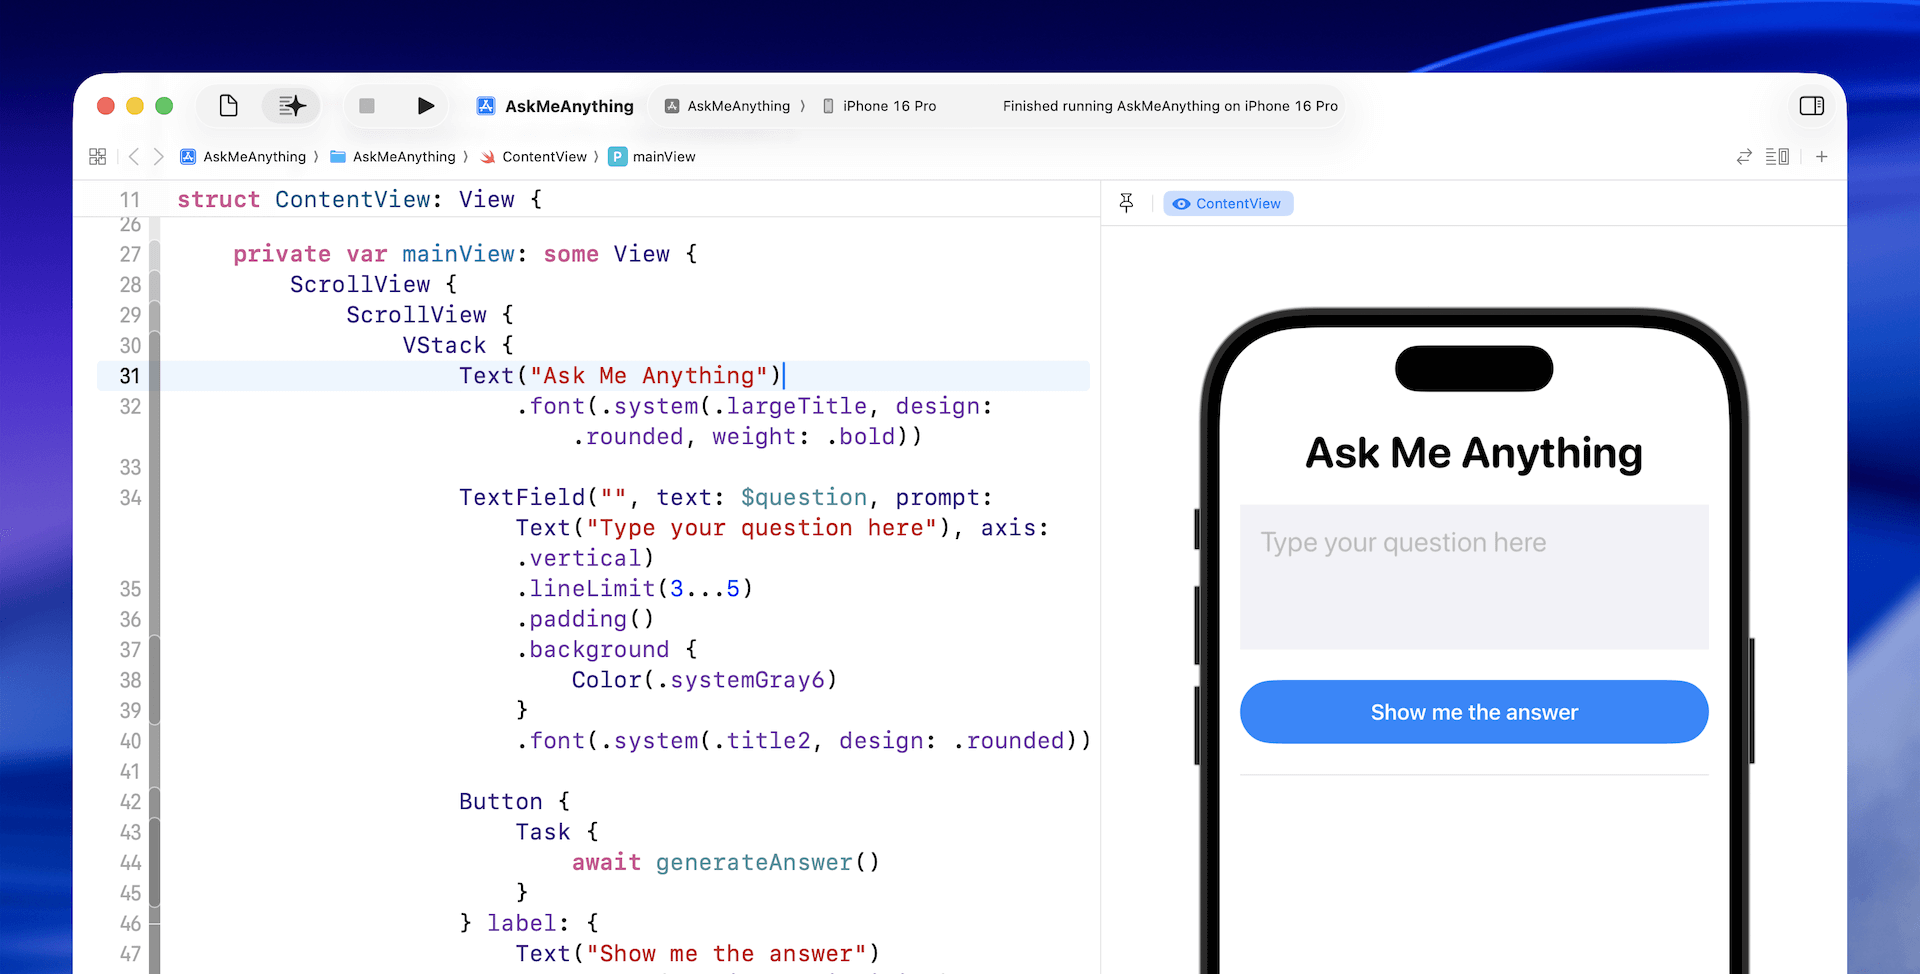
Generating Responses with the Language Model
Now we’ve come to the core part of app: sending the question to the model and generating the response. To handle this, we create a new function called generateAnswer():
private func generateAnswer() async {
    let session = LanguageModelSession()
    do {
        let response = try await session.respond(to: question)
        answer = response.content
    } catch {
        answer = "Failed to answer the question: \(error.localizedDescription)"
    }
}
As you can see, it only takes a few lines of code to send a question to the model and receive a generated response. First, we create a session using the default system language model. Then, we pass the user’s question, which is known as a prompt, to the model using the respond method.
The call is asynchronous as it usually takes a few second (or even longer) for the model to generate the response. Once the response is ready, we can access the generated text through the content property and assign it to answer for display.
To invoke this new function, we also need to update the closure of the “Get Answer” button like this:
Button {
    Task {
        await generateAnswer()
    }
} label: {
    Text("Show me the answer")
        .frame(maxWidth: .infinity)
        .font(.headline)
}
You can test the app directly in the preview pane, or run it in the simulator. Just type in a question, wait a few seconds, and the app will generate a response for you.
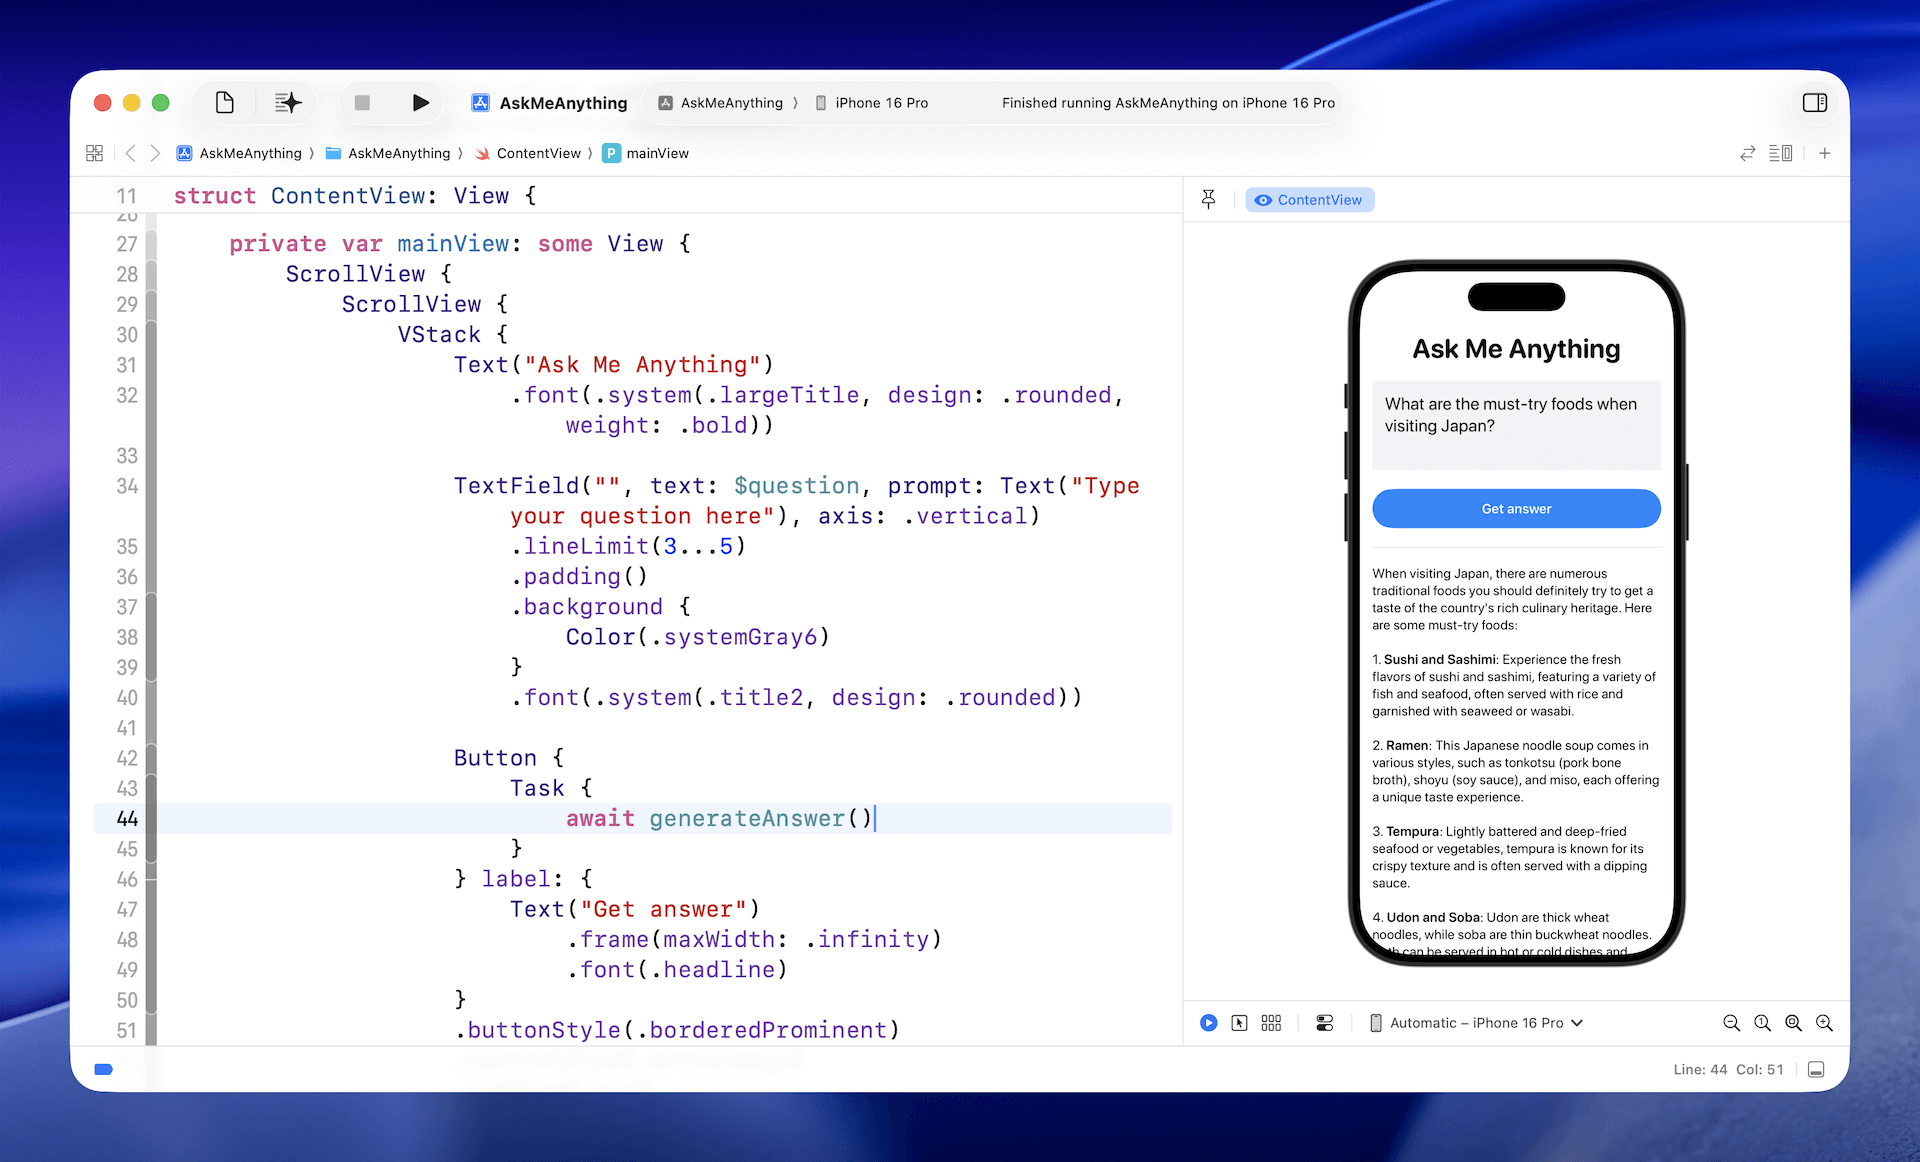
Reusing the Session
The code above creates a new session for each question, which works well when the questions are unrelated.
But what if you want users to ask follow-up questions and keep the context? In that case, you can simply reuse the same session each time you call the model.
For our demo app, we can move the session variable out of the generateAnswer() function and turn it into a state variable:
@State private var session = LanguageModelSession()
After making the change, try testing the app by first asking: “What are the must-try foods when visiting Japan?” Then follow up with: “Suggest me some restaurants.”
Since the session is retained, the model understands the context and knows you’re looking for restaurant recommendations in Japan.
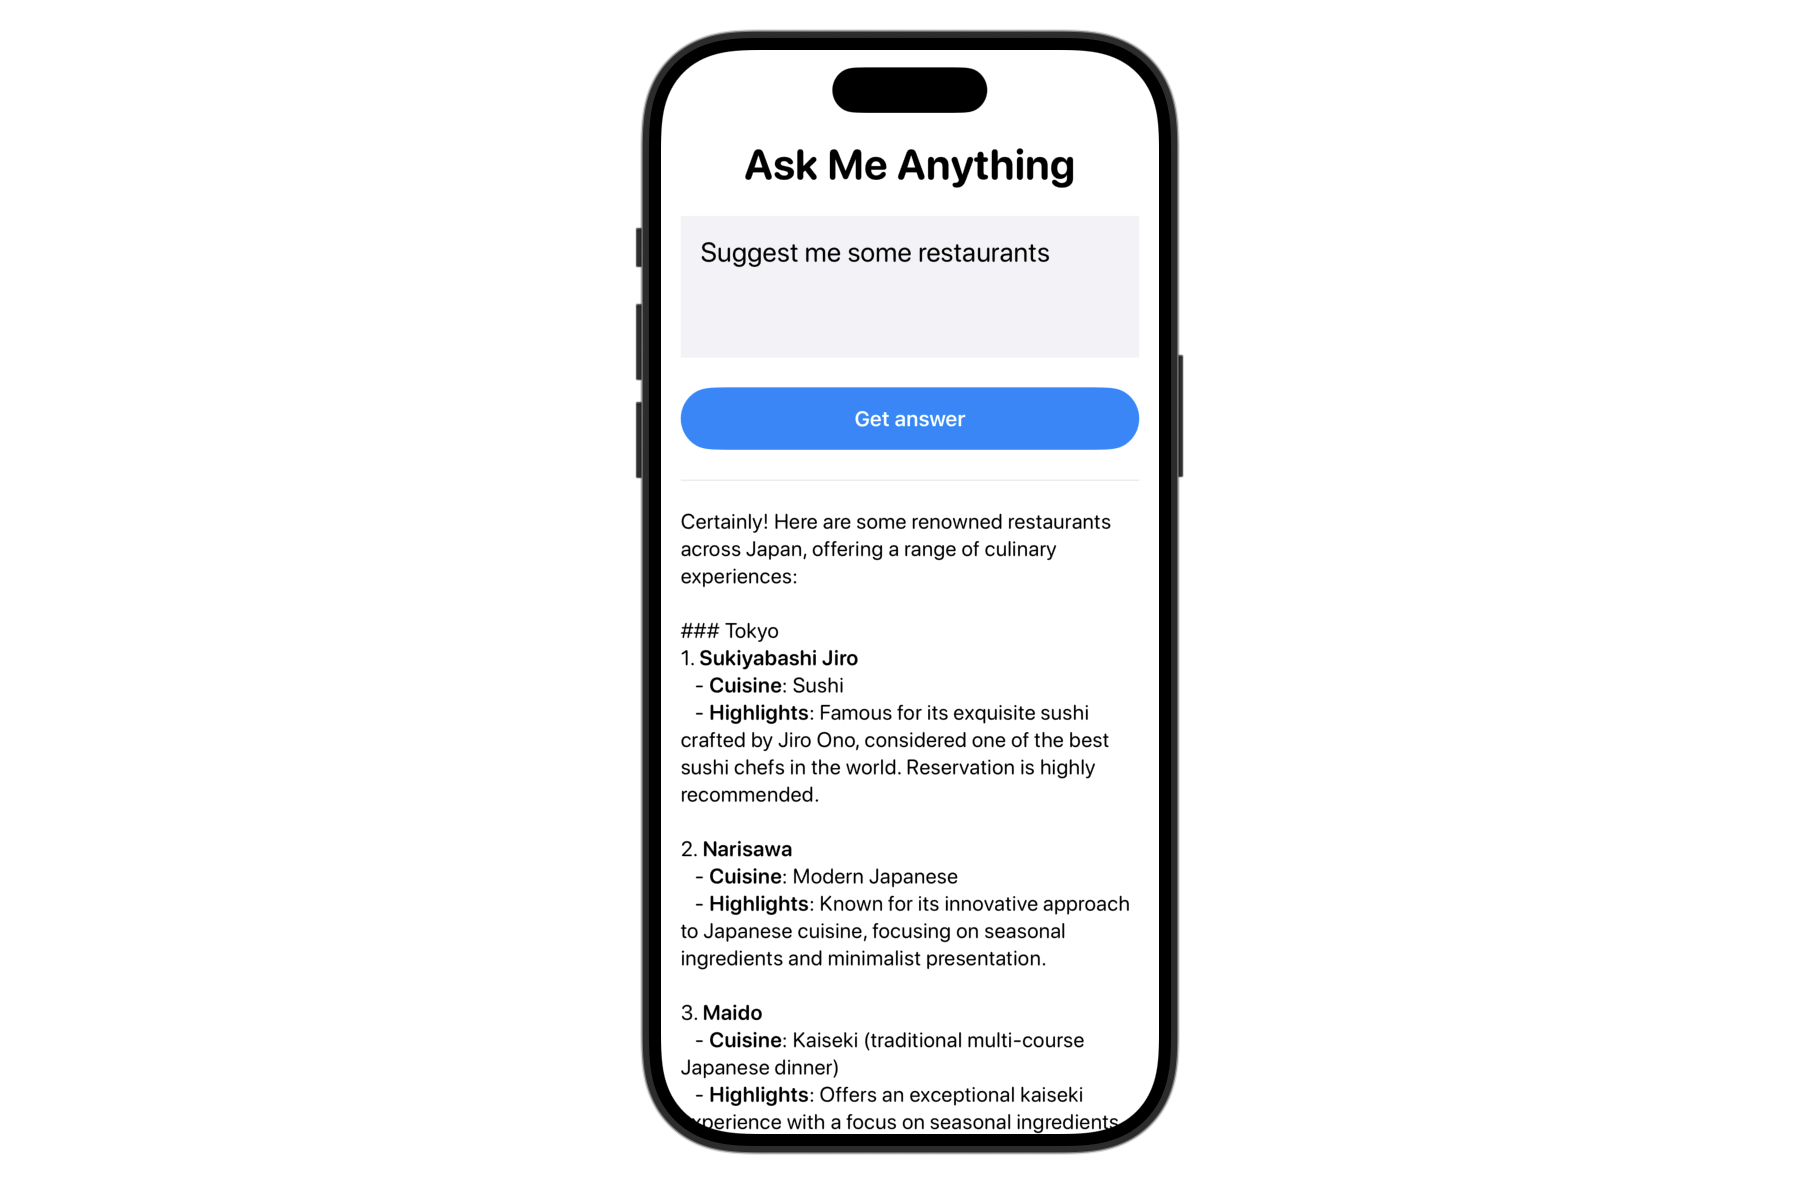
If you don’t reuse the same session, the model won’t recognize the context of your follow-up question. Instead, it will respond with something like this, asking for more details:
“Sure! To provide you with the best suggestions, could you please let me know your location or the type of cuisine you’re interested in?”
Disabling the Button During Response Generation
Since the model takes time to generate a response, it’s a good idea to disable the “Get Answer” button while waiting for the answer. The session object includes a property called isResponding that lets you check if the model is currently working.
To disable the button during that time, simply use the .disabled modifier and pass in the session’s status like this:
Button {
    Task {
        await generateAnswer()
    }
} label: {
    .
    .
    .
}
.disabled(session.isResponding)
Working with Stream Responses
The current user experience isn’t ideal — since the on-device model takes time to generate a response, the app only shows the result after the entire response is ready.
If you’ve used ChatGPT or similar LLMs, you’ve probably noticed that they start displaying partial results almost immediately. This creates a smoother, more responsive experience.
The Foundation Models framework also supports streaming output, which allows you to display responses as they’re being generated, rather than waiting for the complete answer. To implement this, use the streamResponse method rather than the respond method. Here’s the updated generateAnswer() function that works with streaming responses:
private func generateAnswer() async {

    do {
        answer = ""
        let stream = session.streamResponse(to: question)
        for try await streamData in stream {
		        answer = streamData.asPartiallyGenerated()
        }
    } catch {
        answer = "Failed to answer the question: \(error.localizedDescription)"
    }
}
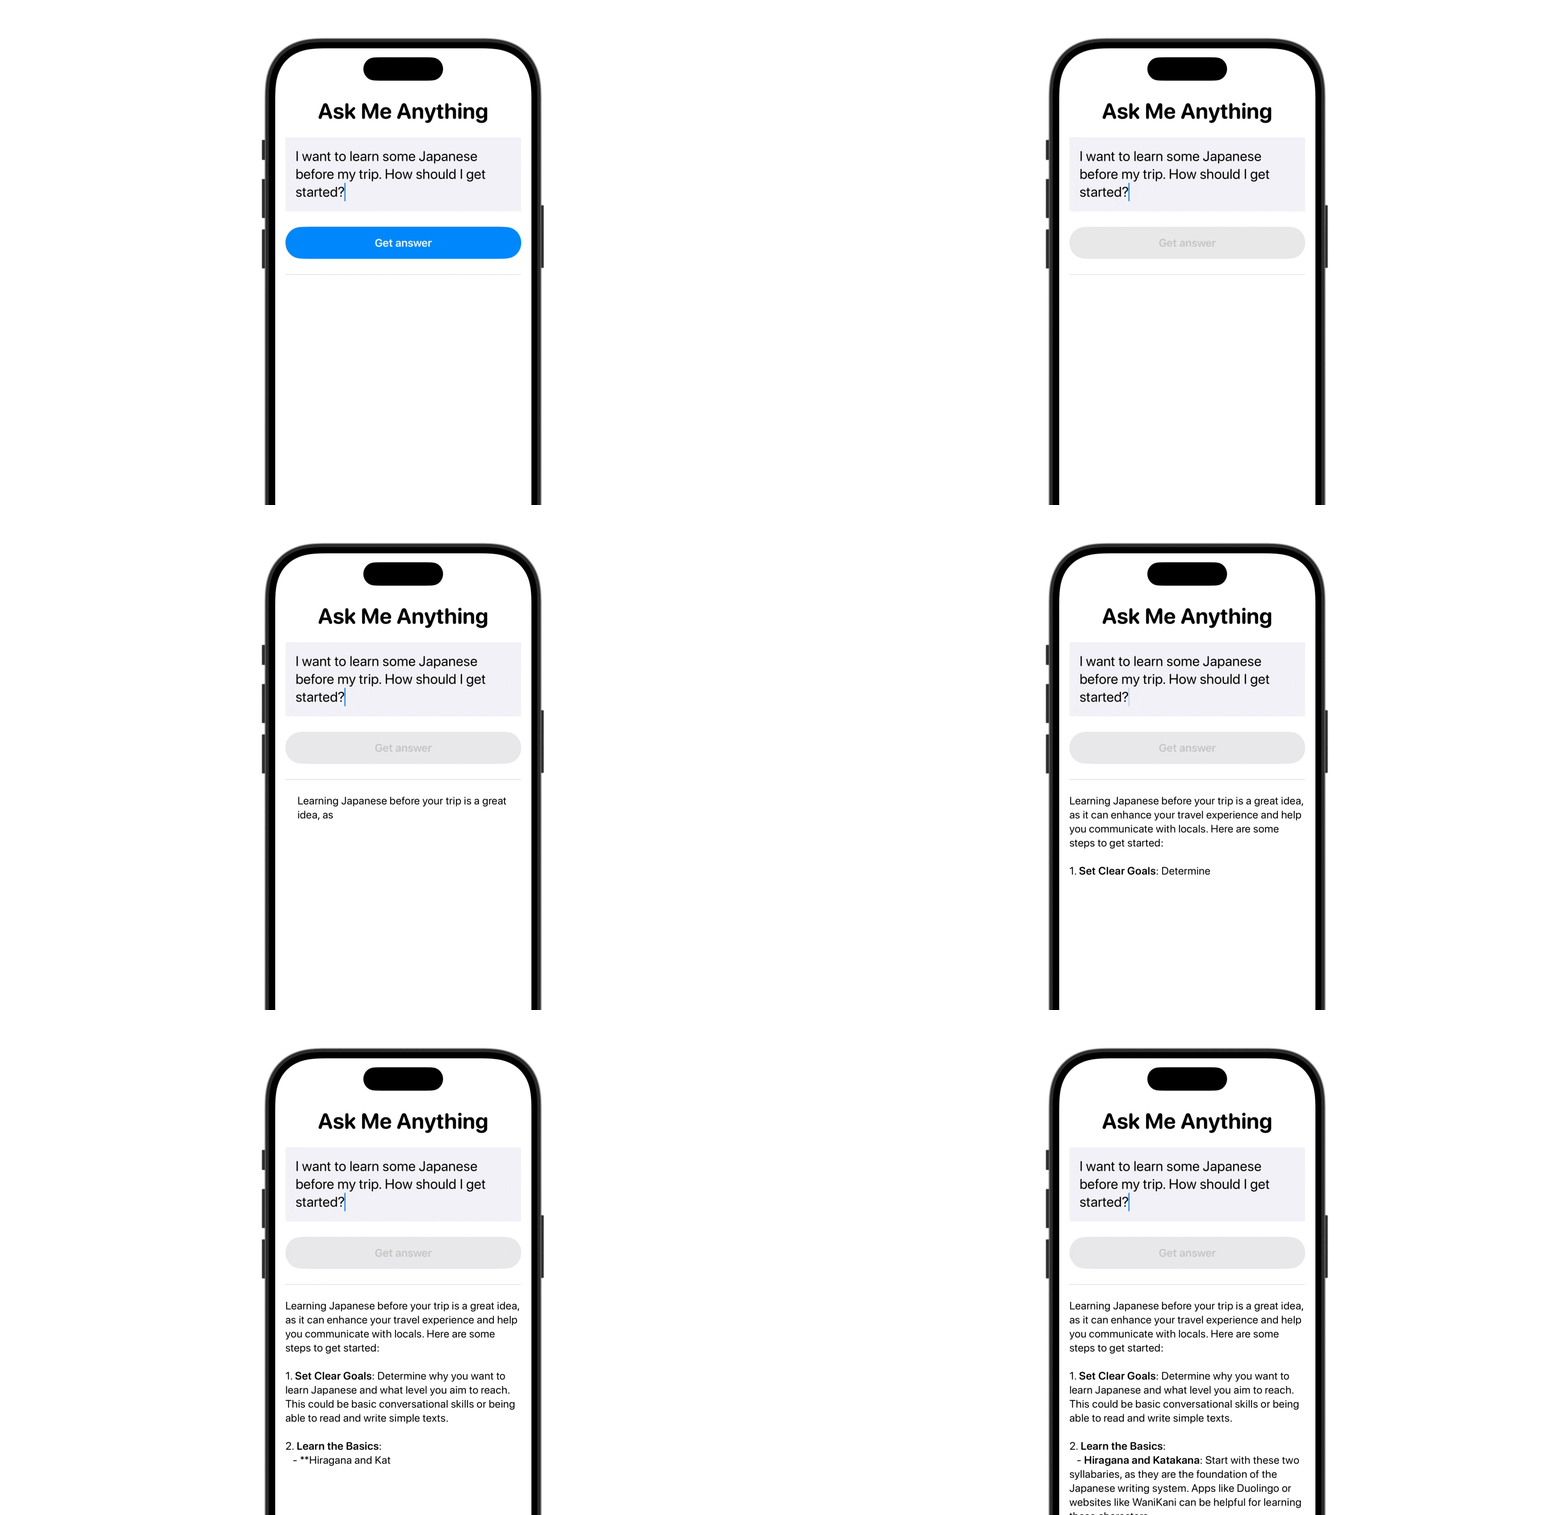
Just like with the respond method, you pass the user’s question to the model when calling streamResponse. The key difference is that instead of waiting for the full response, you can loop through the streamed data and update the answer variable with each partial result — displaying it on screen as it’s generated.
Now when you test the app again and ask any questions, you’ll see responses appear incrementally as they’re generated, creating a much more responsive user experience.
Customizing the Model with Instructions
When instantiating the model session, you can provide optional instructions to customize its use case. For the demo app, we haven’t provided any instructions during initialization because this app is designed to answer any question.
However, if you’re building a Q&A system for specific topics, you may want to customize the model with targeted instructions. For example, if your app is designed to answer travel-related questions, you could provide the following instruction to the model:
“You are a knowledgeable and friendly travel expert. Your job is to help users by answering travel-related questions clearly and accurately. Focus on providing useful advice, tips, and information about destinations, local culture, transportation, food, and travel planning. Keep your tone conversational, helpful, and easy to understand, as if you’re speaking to someone planning their next trip.”
When writing instructions, you can define the model’s role (e.g., travel expert), specify the focus of its responses, and even set the desired tone or style.
To pass the instruction to the model, you can instantiate the session object like this:
var session = LanguageModelSession(instructions: "your instruction")Summary
In this tutorial, we covered the basics of the Foundation Models framework and showed how to use Apple’s on-device language model for tasks like question answering and content generation.
This is just the beginning — the framework offers much more. In future tutorials, we’ll dive deeper into other new features such as the new @Generable and @Guide macros, and explore additional capabilities like content tagging and tool calling.
If you’re looking to build smarter, AI-powered apps, now is the perfect time to explore the Foundation Models framework and start integrating on-device intelligence into your projects.

