In the earlier tutorial, I have walked you through the basics of SwiftData, a new framework introduced in iOS 17 as a replacement for Core Data. If you have followed that tutorial, you should now be familiar with using SwiftData to save and manage data in a database. The built-in @Model macro and the @Query macro greatly simplify the process of defining data model and retrieving records from the database, making it extremely easy for developers to handle persistent data.
The Preview feature in SwiftUI is highly valuable as it allows developers to instantly visualize the app’s user interface without the need to launch the simulator. However, using SwiftData with SwiftUI Preview requires some additional steps. In this tutorial, we will explore how to integrate SwiftData with SwiftUI Preview effectively.
Note: If you haven’t read the SwiftData tutorial, I highly recommend checking it out first, as this tutorial references some of the materials covered in that tutorial.
Revisiting the Data Model and SwiftData
In the previous example, we have built a model class for ToDoItem like this:
import Foundation
import SwiftData

@Model class ToDoItem: Identifiable {
    var id: UUID
    var name: String
    var isComplete: Bool

    init(id: UUID = UUID(), name: String = "", isComplete: Bool = false) {
        self.id = id
        self.name = name
        self.isComplete = isComplete
    }
}
SwiftData simplifies the process of defining a schema using code. You only need to mark the model class with the @Model macro. SwiftData will then automatically enable persistence for the data class.
In order to drive the data operations (like update, insert, read, and delete), we also need to set up the model container. In the ToDoDemoAppApp.swift, we have attached the modelContainer modifier like below:
struct ToDoDemoAppApp: App {
    var body: some Scene {
        WindowGroup {
            ContentView()
        }
        .modelContainer(for: ToDoItem.self)
    }
}
This configuration is essentially all you need before starting to work with SwiftData.
Preview with SwiftData and In-memory Container
In the Todo app demo, we have a ContentView that loads and displays the to-do item in the list view. Here is the sample code:
struct ContentView: View {
    @Environment(\.modelContext) private var modelContext

    @Query var todoItems: [ToDoItem]

    var body: some View {
        NavigationStack {
            List {
                ForEach(todoItems) { todoItem in
                    HStack {
                        Text(todoItem.name)

                        Spacer()

                        if todoItem.isComplete {
                            Image(systemName: "checkmark")
                        }
                    }
                }
            }

            .navigationTitle("To Do List")
        }
    }
    }
You can make the preview work by writing the preview code like this:
#Preview {
    ContentView()
        .modelContainer(for: ToDoItem.self)
}
However, in this case, the preview only displays an empty Todo list because the container doesn’t have any data populated. If you desire to have some sample data, you can create a custom model container specifically for the preview. Here is an example:
@MainActor
let previewContainer: ModelContainer = {
    do {
        let container = try ModelContainer(for: ToDoItem.self,
                                           configurations: .init(isStoredInMemoryOnly: true))

        for _ in 1...10 {
            container.mainContext.insert(generateRandomTodoItem())
        }

        return container
    } catch {
        fatalError("Failed to create container")
    }
}()

func generateRandomTodoItem() -> ToDoItem {
    let tasks = [ "Buy groceries", "Finish homework", "Go for a run", "Practice Yoga", "Read a book", "Write a blog post", "Clean the house", "Walk the dog", "Attend a meeting" ]

    let randomIndex = Int.random(in: 0..
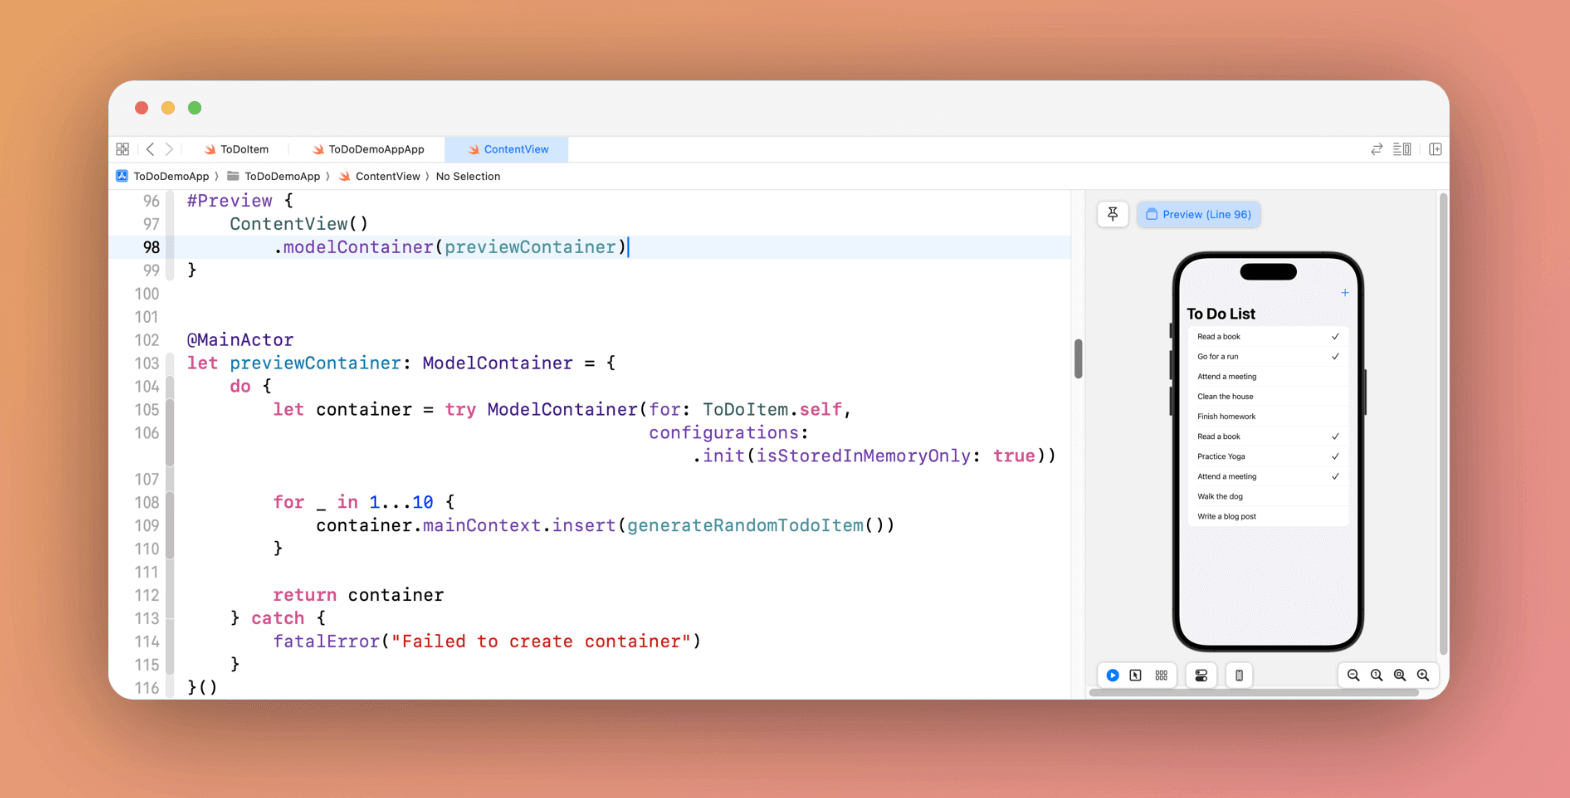
We instantiate a ModelContainer with an in-memory configuration and populate the container with 10 random to-do items. To use this preview container, you simply modify the preview code and specify to use the previewContainer:
#Preview {
    ContentView()
        .modelContainer(previewContainer)
}
Once you made the modification, the preview pane should show you the Todo list view with 10 random items.

Summary
SwiftUI Preview is a valuable feature that allows developers to visualize their app’s user interface instantly, without the need to launch the simulator. This tutorial provides comprehensive guidance on effectively using SwiftData with SwiftUI Preview. You should learn how to create a custom container populated with sample data specifically for preview purposes.
If you enjoy reading this tutorial and want to learn more about SwiftUI, don’t forget to check out our Mastering SwiftUI book for iOS 17 and Xcode 15.

